
Mini Disappearing 9 patch tutorial
This post may contain affiliate links which won’t change your price but will share a commission.Have you ever made the disappearing 9-patch block? Using just a couple of fabrics and the way you arrange your blocks can give you several different variations for a small wall hanging or table topper. This is a great quilt project for a new quilter.

Mini Disappearing Nine-patch quilt tutorial

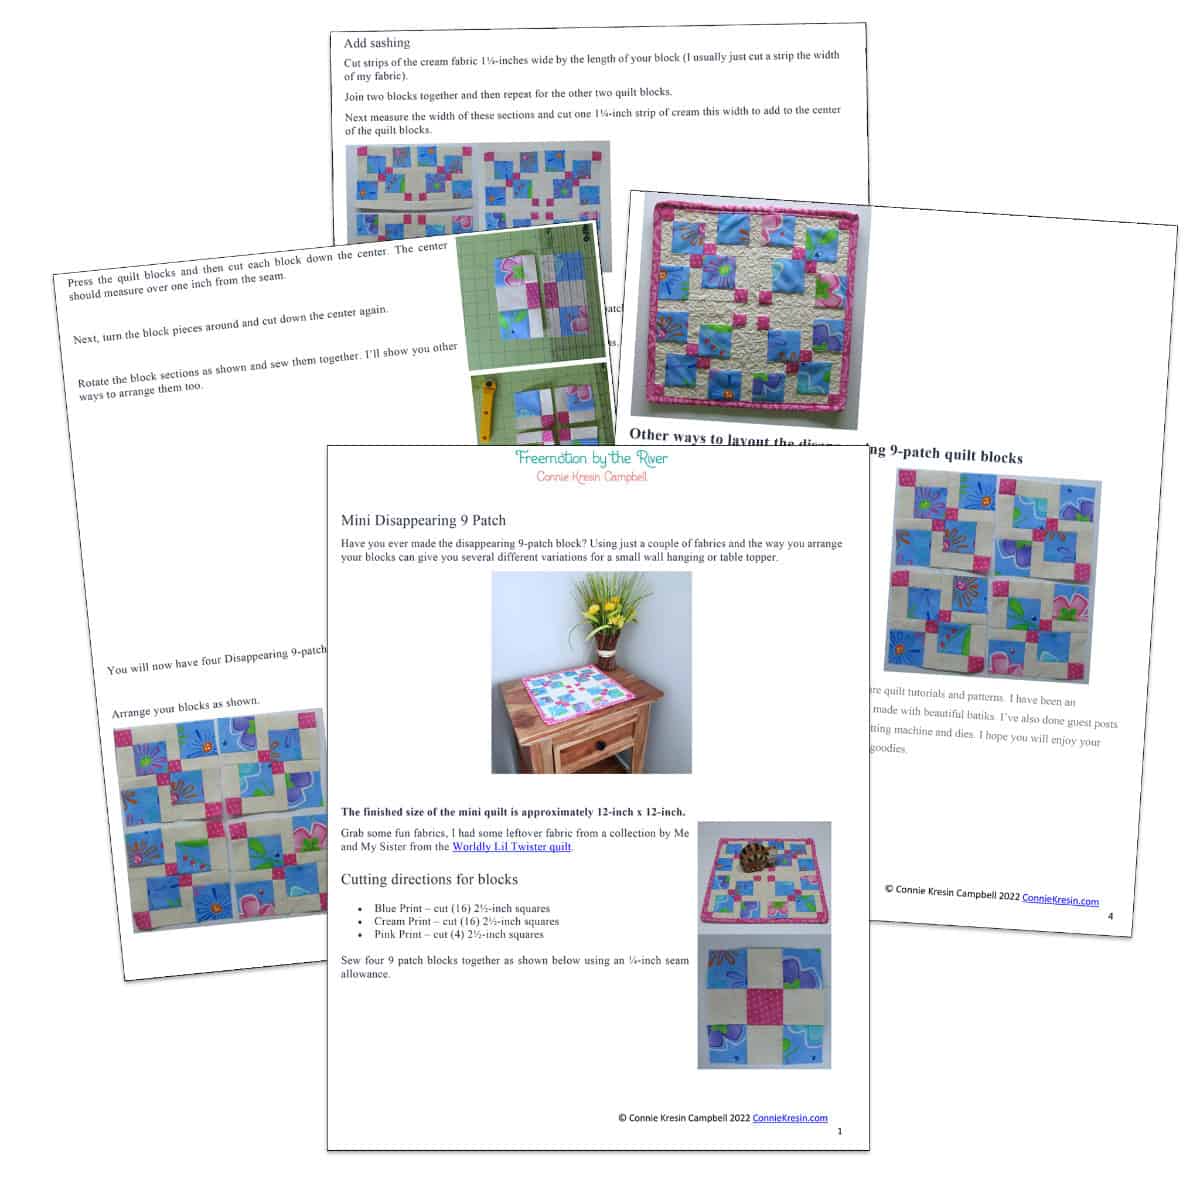
Get an ad-free downloadable PDF of the Mini Disappearing 9-Patch tutorial.
The finished size of the mini quilt is approximately 12-inch x 12-inch.
Grab some fun fabrics, I had some leftover fabric from a collection by Me and My Sister from the Worldly Lil Twister quilt, this is also a great way to use your scraps for a scrappy quilt.
Fabrics
- Blue Print – 1/4 yard
- Cream Print – 1/4 yard
- Pink Print – 1/4 yard
- 1/2 yard backing and batting
Cutting directions for blocks
- Blue Print – cut (16) 2½-inch squares
- Cream Print – cut (16) 2½-inch squares
- Pink Print – cut (4) 2½-inch squares
Sew four nine-patch blocks together as shown below using an ¼-inch seam allowance.

Press the quilt blocks and then cut each block down the center. The center should measure over one inch from the seam.

Next, turn the block pieces around and cut down the center again.
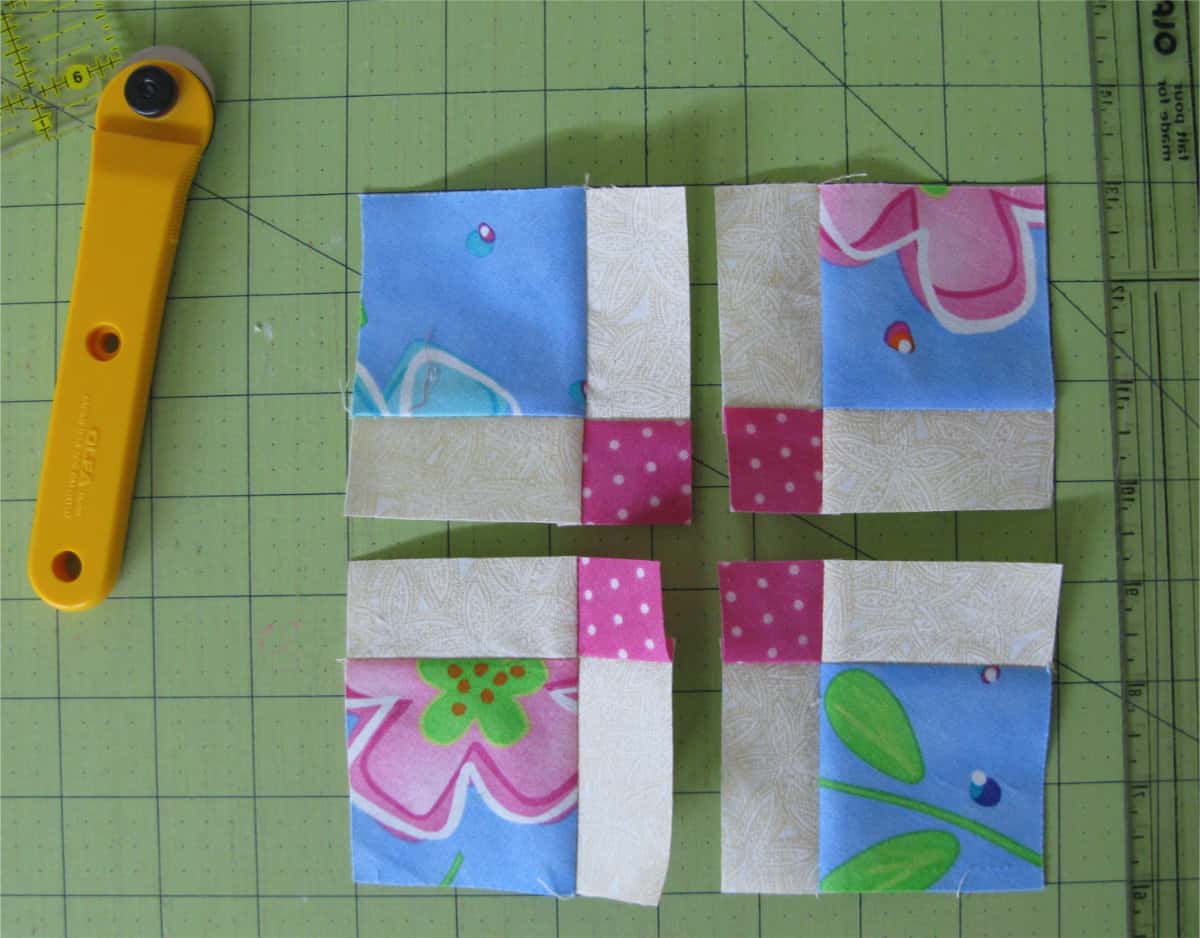
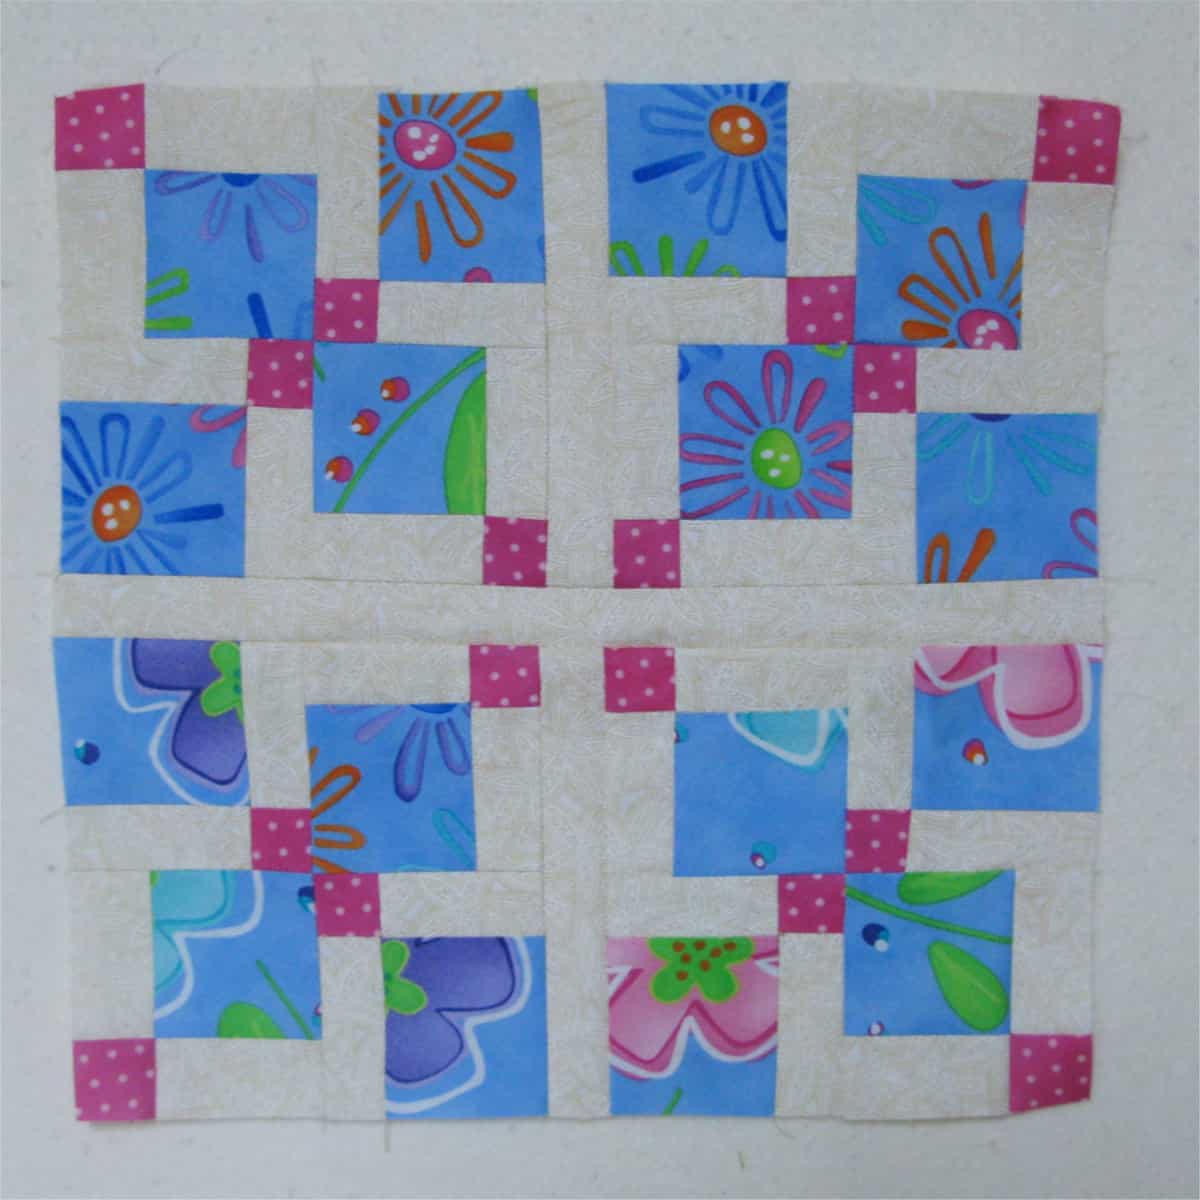
Rotate the block sections as shown and sew them together. I’ll show you other ways to arrange them too.

You will now have four Disappearing 9-patch quilt blocks.

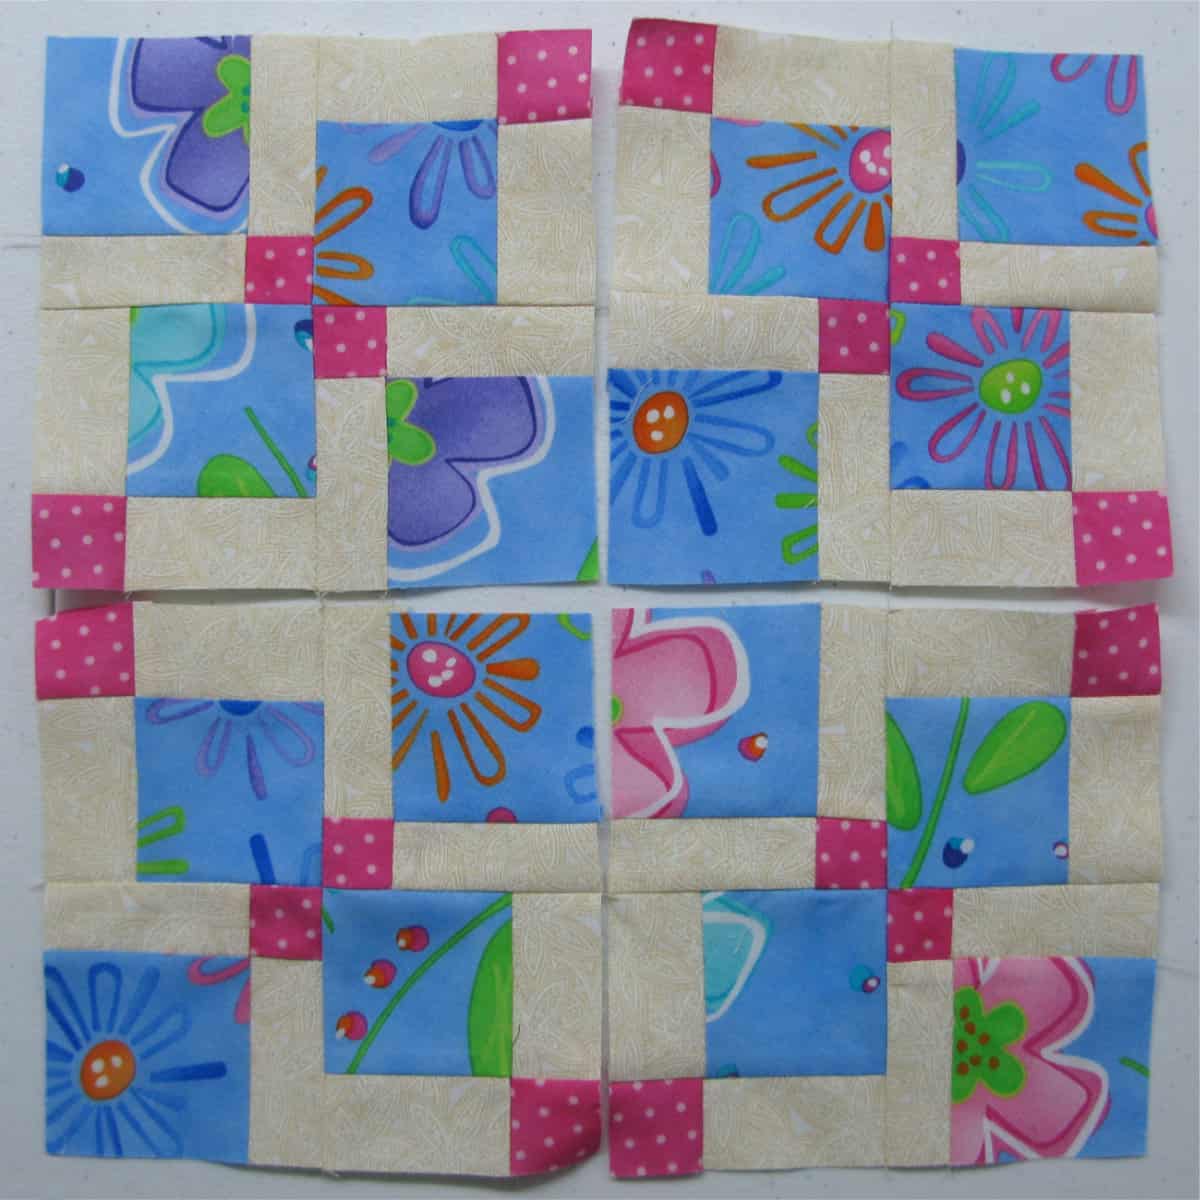
Arrange your blocks as shown.

Add sashing
Cut strips of the cream fabric 1¼-inches wide by the length of your block (I usually just cut a strip the width of my fabric).
Join two blocks together and then repeat for the other two quilt blocks.
Next measure the width of these sections and cut one 1¼-inch strip of cream this width to add to the center of the quilt blocks.

Quilt your mini disappearing 9 patch
Add batting and backing to your mini disappearing 9-patch quilt and quilt as desired. Here is the back of mine so you can see how I quilted it.
I did a small stipple loop quilting in the background areas.

Add binding to complete your mini quilt
I didn’t have enough of the Amelia line of fabrics for the binding but I had just bought some new fabrics from Me and My Sister and the color coordinated perfectly! You will find that many designers do this.
Cut two strips of fabric 2¼-inch by the width of the fabric for your binding. Piece the strips together and fold in half lengthwise with the wrong sides together.
Follow my easy How to Add Binding to your Quilt tutorial.

Other ways to layout the disappearing 9-patch quilt blocks

Mini Disappearing 9 patch tutorial
This post was originally written and posted in March of 2012! Where does the time go? I updated the post as things have really changed with blogging in ten years. This is when I first took over a spare bedroom and turned it into my quilt room at the river house.
Here is Builder Bob installing a new light for me.

I hope you enjoyed this tutorial! This blog post has been converted to an optional PDF that’s optimized for printing. Purchase an ad-free printable PDF version of the Mini Disappearing 9-patch quilt tutorial in my shop. The photos have been reduced in size.
Mini Disappearing 9-Patch Quilt Tutorial
Please note that this post contains affiliate links, which means I’ll earn a small commission if you purchase through my link at no extra cost to you. Please see the full disclosure here. As an Amazon Associate, I earn from qualifying purchases.
Great deals for you!
Looking for great buys on fabric and things? Check out these links

About Connie
Hi, I’m Connie Kresin Campbell, the quilter, writer, and photographer behind Freemotion By the River. I enjoy inspiring others with my quilt tutorials and patterns. You’ll also see my sweet adopted dogs from time to time.
Be sure and subscribe to my newsletter for more free tutorials and printables.


Hi Connie
I have been following you for years. I forgot about the mini disappearing 9-patch. When the block is reconstructed with the 1.25 inch sashing inbetween, what is the finished block size? I was thinking of making a baby quilt using this technique.
Thanks for helping me learn new blocks and techniques I can run with to make pillows, table runners, or quilts.
JO
Connie
I love the disappearing mini nine patch block, but would like the cutting dimensions for a table topper if you could provide it.
Thanks for all you many tutorials that i continue to use.
Love the stipple quilting you do. I have a had time keeping it even, sometimes I’m just spinning all over the place! This looks good front or back! Thanks!
Thanks for reposting. It’s been a while since I played with disappearing blocks. Oh the possibilities!
This is one of my favorite blocks to make!!!
Looks great with 3 different fabrics, or with scraps.
Good luck with Mr. Mickey
Thank you for the tutorial. I’ve wanted to learn this technique and you’re explaining it really well.
Prayers for Mickey! and Love your emails and patterns! Thank you and keep us posted w his medicals!
Another lovely design to thank you for Connie. Great for a beginner like me.
Thinking of you and your family and hope that Mr Mickey gets a good result from his medical tests. He’s absolutely the cutest dog.
Prayers for Mr. Mickey’s test today. I hope the results are better than expected. I remember when the D9P block was the rage. It’s nice to see it resurface again….ingenious!
Thanks for the pattern, Connie. So glad the little one is improving. Wishing for complete and speedy recovery. I have not made a complete quilt but have sewn several practice blocks to marvel at the varieties that could be made. Your mini quilt is so pretty and the colors are very nice. I think I will use this pattern to make a lap or teen charity quilt. With the 12 inch size, it should be a breeze. Thanks, as always, for sharing.
Prayers for your pup and family that all goes well! Love the mini quilt and all the different ways it can be done. Your handwork is truly beautiful.
Prayers up for me mickey I just know all will be fine with him and he I’ll live a long loving life with you thanks for pattern disappearing 9 patch is always my go to qiult made late one in bandana prints love it so much take care
I don’t quilt (yet) but that is really interesting and may be the pattern that pushes me to my first quilting project!
Prayers for Mr. Mickey.
The possibilities are limitless with this one 9-patch block! Love the new settings you show.
Best wishes for Mr. Mickey! Love the nine patch – I’ve never done one with sashing and it adds so much to the design! The banner above this box also shows a similar design of yours and it’s stunning as well with the flowers! Making some crate pads for the Humane Society – this looks like a perfect pattern for that! Fun easy! Thanks,
Thank you for this pattern
Darling little topper — perfect for my wicker table! I’m going to have to give this pattern a try VERY soon! Thanks for sharing, Connie! 🙂