
Fun Flower Table Topper Tutorial
This post may contain affiliate links which won’t change your price but will share a commission.Sometimes the easiest quilt project can be the perfect accent for your table or it can be a fast and easy last-minute gift.
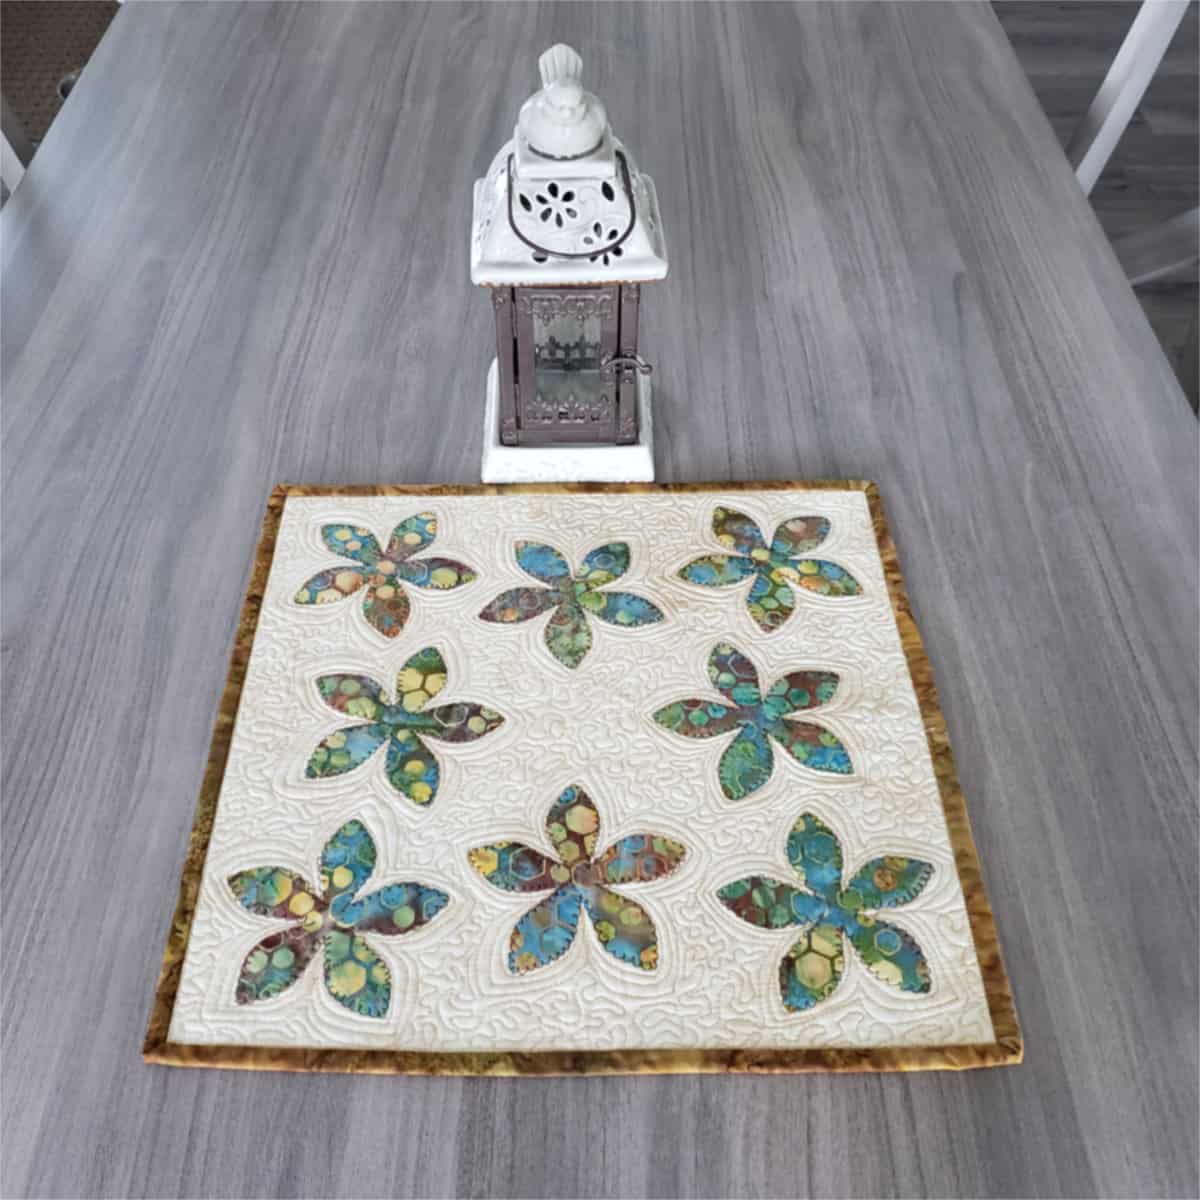
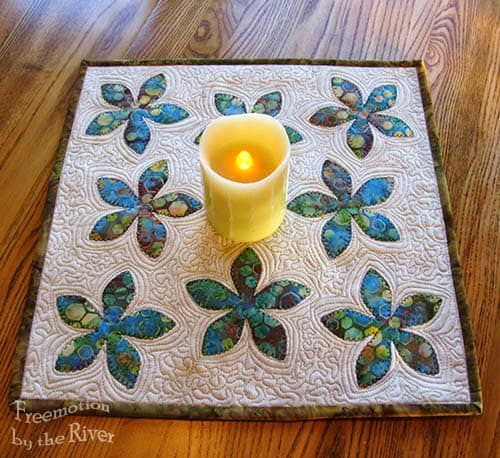
16″ x 16″ Flower Table Topper
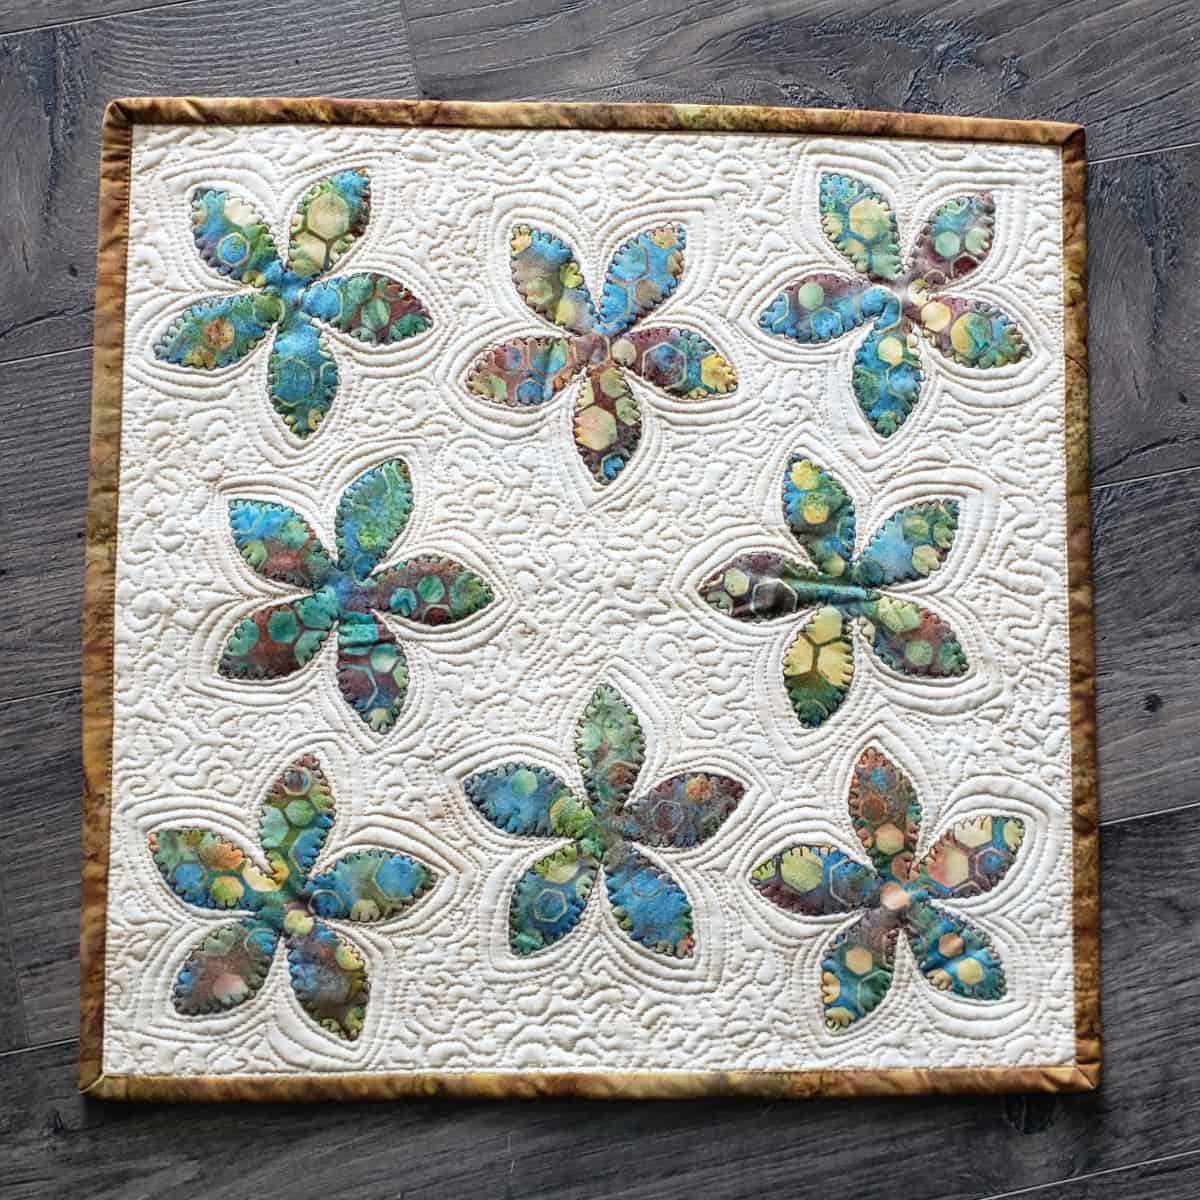
I just cut out 8 cute flowers and used Heat n Bond to attach them to a background fabric for the table topper.
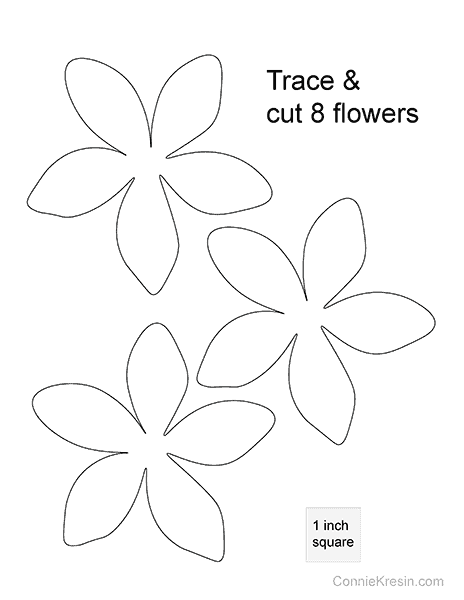
This is an appliqued table topper that I made using my AccuQuilt Fun Flower die. If you don’t have this die, don’t worry, I have a downloadable template you can use.
I used the #55334 Fun Flower die which will work in all of the AccuQuilt die cutters.

Equipment
- Sewing Machine
- 16-inch pillow insert
- Basic Sewing Tools
- Thread
- Quilt Ruler
- Rotary Cutter
- Cutting Mat
- Clover Flower Head Pins
- Binding Clips
- Clapper – excellent for setting seams
- Wool Pressing Mat
- Lighting
You will need the following:
- 1 – 16-inch x 16-inch background fabric
- 1 – fat quarter of batik for the flowers
- Iron on fusible webbing – I used Heat n Bond Lite
- 1 – 16-inch x 16-inch piece of batting – I used Warm & Natural
- 1 – 16-inch x 16-inch backing fabric
- 2 – 2 1/2 inch strips the width of fabric for binding
- Thread to match flowers and also for background quilting
Cut your batik fabric into 5-inch strips and add the iron on fusible webbing to the back. Then cut out (8) flowers with the die – if you don’t have the Fun Flower die, just trace the flower template (8) times onto the Heat n Bond before fusing to the fabric. It won’t take long to cut out the flowers with your scissors.
Iron your background fabric in half, then folded it again and then on the diagonal to get the creases shown below.
Remove the paper from the fusible and place your flowers on with the corner flowers having a petal 2 inches from the edge and the other 4 flowers spaced 3 1/2 inches from the edge as shown.

Applique the flowers
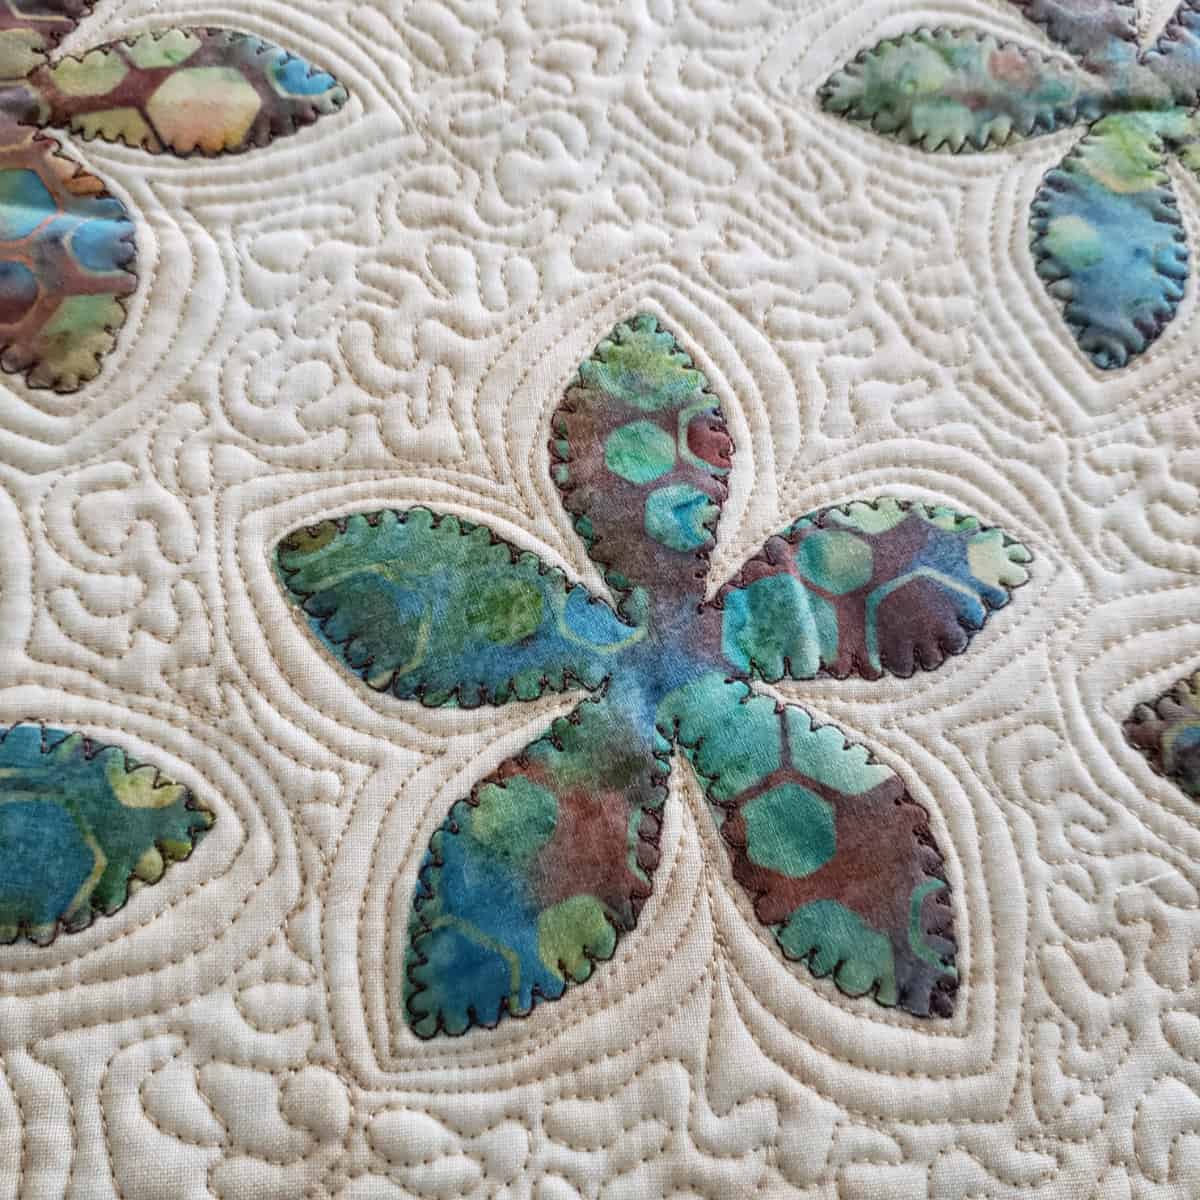
Applique around the flowers using your favorite way to applique. I preferred doing a free-motion wiggle applique around my flowers.
I placed my batting behind the top but I didn’t add the backing yet. I then used my vintage 15-91 Singer to free-motion quilt around each flower using a dark brown thread.

When I was done appliqueing around the flowers I added my backing, switched to a light creme thread and echo quilted around the flowers, and filled in with some stippling.
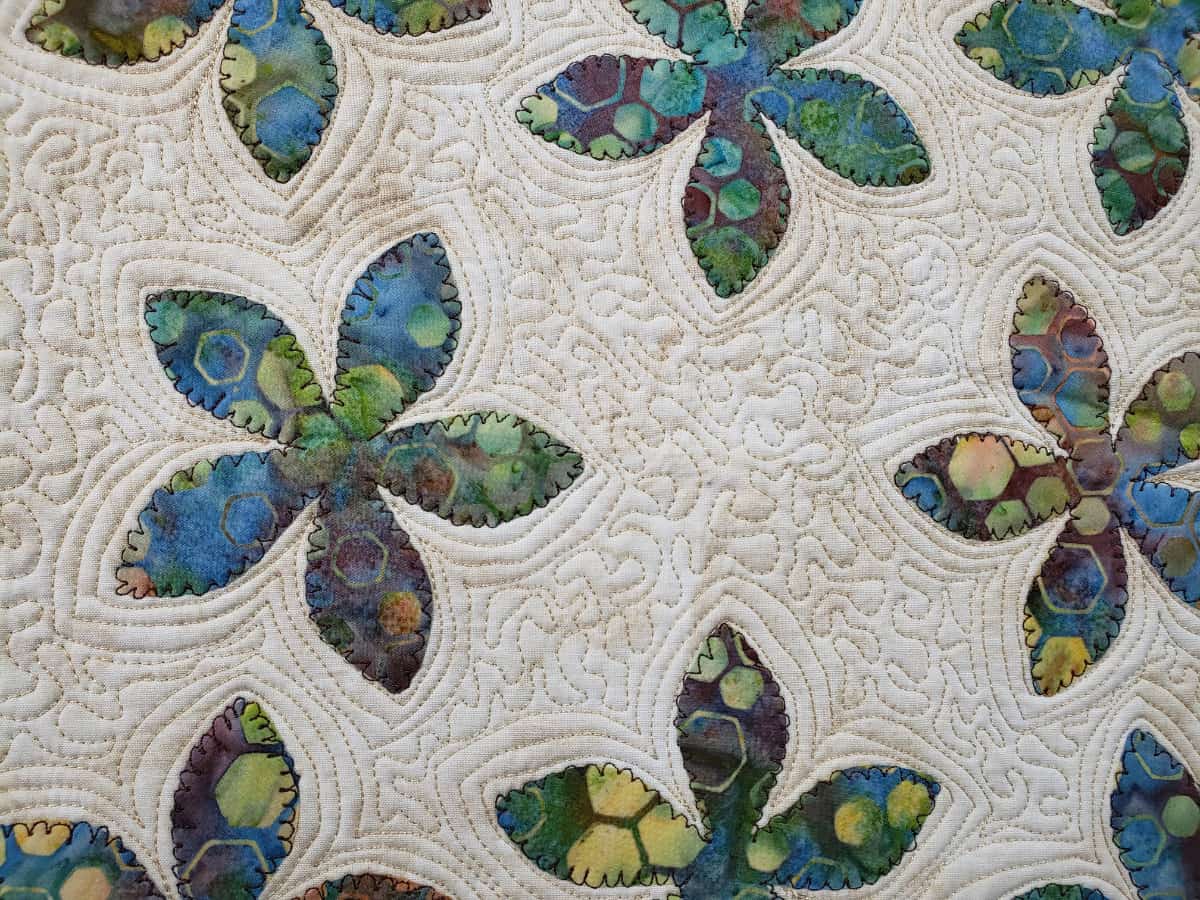
Here is a closer view of the quilting on the table topper.
I pieced together the (2) 2½-inch strips of binding, folded them in half, and machine stitched it to the front of my table topper after I attached the little label in the corner. I then stitched down the binding on the backside.
Isn’t that a cute fabric on the back? I have no idea how long ago I bought it and only had a fat quarter of it.

Here it is with a battery-operated flameless candle on it. With these, you don’t have to worry about a fire or candle wax dripping all over everything.
This is the way I will have it sit on the table.

Keep reading to get the full-size flower template.
Fun Flower Table Topper Tutorial

Get a FREE pdf of this tutorial and the full-size flower template. If you are already subscribed, don’t worry you won’t be subscribed again. You can also find this in my library.
Please note that this post contains affiliate links, which means I’ll earn a small commission if you purchase through my link at no extra cost to you. Please see the full disclosure here. As an Amazon Associate, I earn from qualifying purchases.
Great deals for you!
Looking for great buys on fabric and things? Check out these links

About Connie
Hi, I’m Connie Kresin Campbell, the quilter, writer, and photographer behind Freemotion By the River. I enjoy inspiring others with my quilt tutorials and patterns. You’ll also see my sweet adopted dogs from time to time.
Be sure and subscribe to my newsletter for more free tutorials and printables.


I was rereading what I wrote and today realized how you added extra depth to the flowers by appliquing them with the batting. Very smart! Very nice!
Love both pumpkin mats I’m gonna make both one for tea pot and 2for mugs think that will be a nice fall setting yup my pumpkin s are ready to pick now if we can get out of the high 90s I will be able to enjoy picking them have a great day Linda thomas
Another lovely table mat to show off your digital candle. The appliqued flowers are very pretty. I’ll be able to cut them on my Scan N Cut. There’s an interesting stitch on my Janome portable sewing machine for stitching around the petals.
I haven’t mastered free motionion quilting yet but I’ll work out something for the background.
Thanks as usual for sharing your designs and ideas.
HI Connie, I love your newsletters and you and Mr. Mickey. Your letters always make me happy and I have used several of your patterns. Thanks so much, Lois Blue
That is really pretty, when you used your featherweight to quilt/applique do you drop the feed dogs or do you have a special attachment. Never thought of quilting on my featherweight.
Thanks for sharing
Love the applique stitch around the flowers, makes them look so real! And the shadow! And the backing is really perfect! We have also had weird weather in Chicago (no surprise there) – 74 but steamy!
Thank you for sharing your wonderful ideas!
Connie, what a pretty candle mat! Those battery candles are perfect in our modern world, yet look like the real thing. I love the fabrics you chose and your quilting is great!
Looks great on your table Connie! Always love seeing what your creative mind comes up with;) Hey did you go to the AQS Des Moines show? If so how was it?