
Red Pinwheels Table Runner Tutorial
This post may contain affiliate links which won’t change your price but will share a commission.Are you looking for another fast and easy table runner tutorial?
This Red Pinwheels table runner tutorial would be a perfect one to make and takes no time at all. I have directions to make this with rotary cutting or the AccuQuilt dies, keep reading!
Using coordinating fabrics makes it easy to design blocks and a quilt.

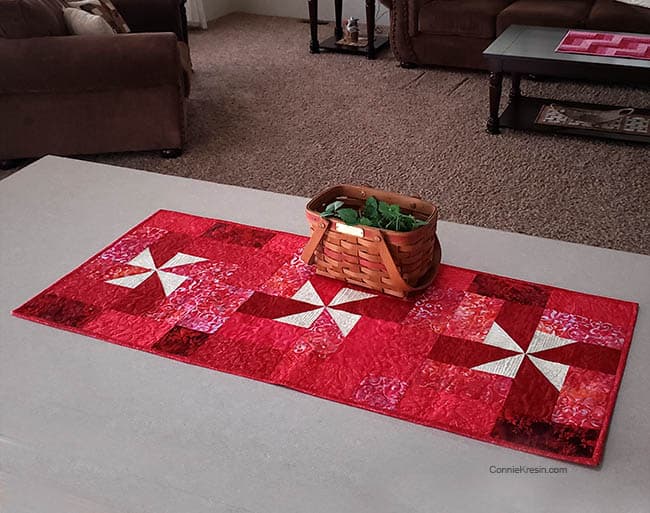
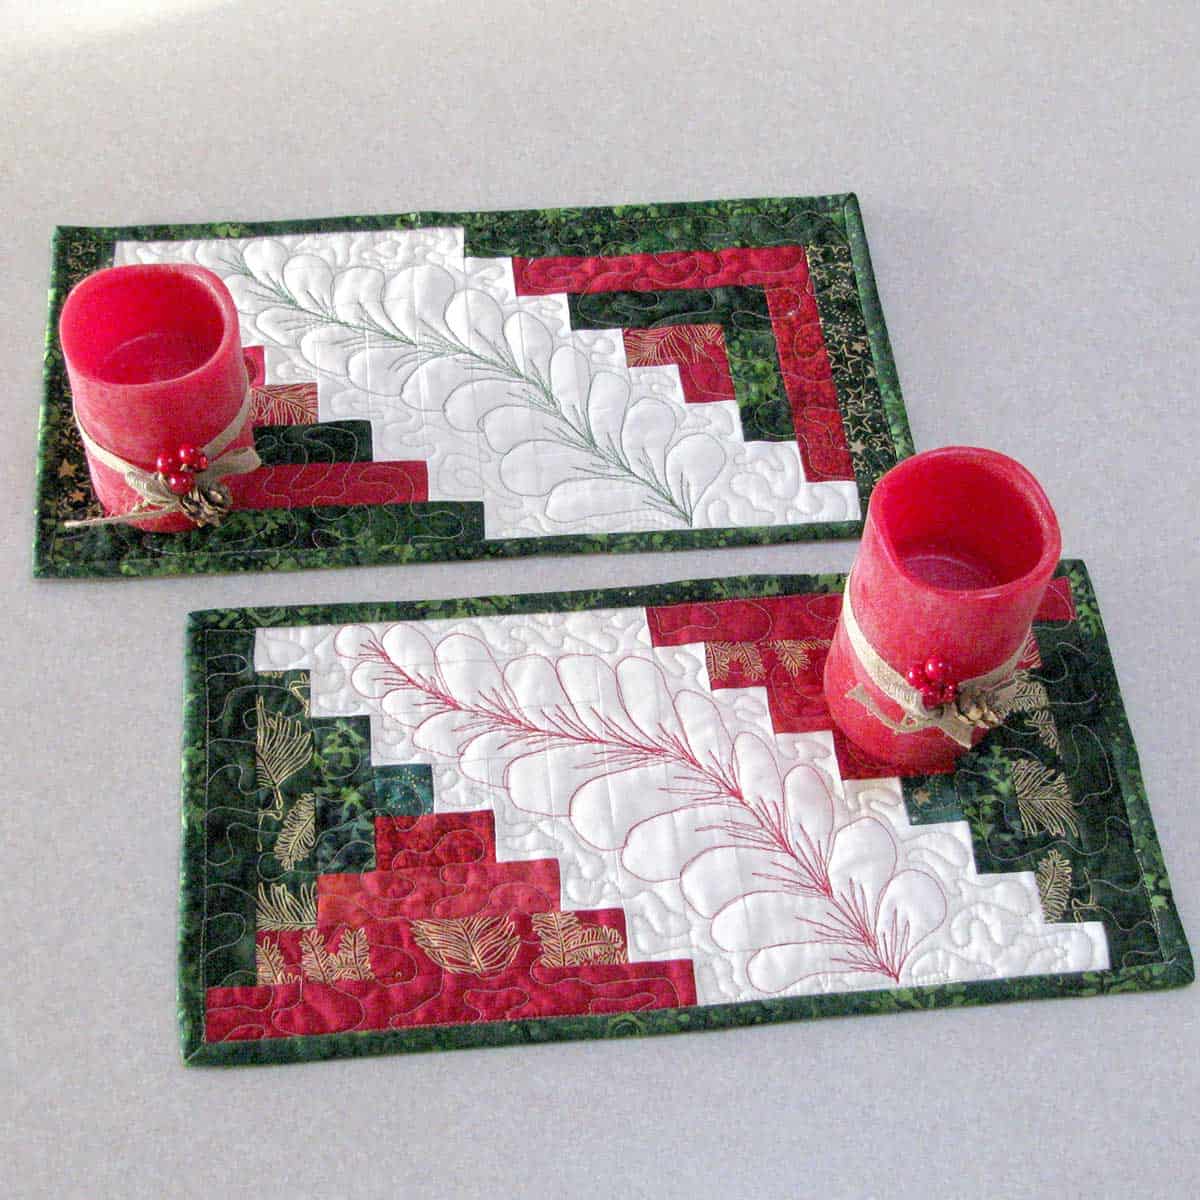
Red Pinwheels Table Runner
16 inch x 42 inch
Decorating for Valentine’s Day or Christmas? I originally shared this on the AccuQuilt blog last year and thought I would share it here in case you missed it.
Today’s table runner would be perfect for the holidays or any time you just want a pop of color.
I used the AccuQuilt 12 inch GO! Qube and the AccuQuilt GO! 12 inch Companion Set to make it but you could easily cut the pieces with your rotary cutter.
Let’s get started on the tutorial!
Skip down a little for the rotary cutting directions.
GO! Fabric Cutter: GO! Fabric Cutter (55100S) or GO! Big Electric Fabric Cutter (55500)
GO! Cutting Dies:
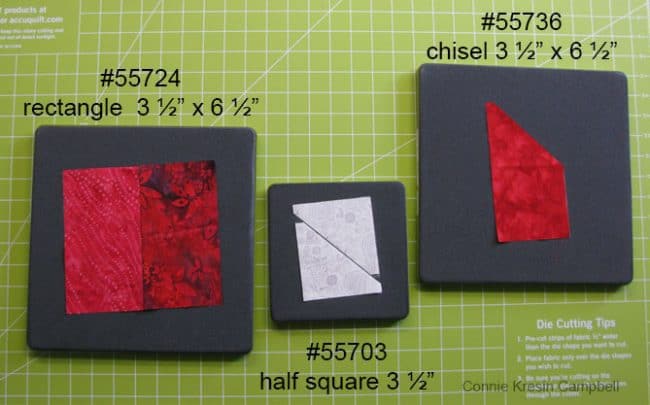
GO! Qube Mix & Match 12 Inch Block (55778) Dies used: #2 – 3 ½” Square, #5 – 3″ Half Square Triangle, #8 – 3 ½” x 6 ½” Rectangle
GO! 12 Inch Companion Set Die used: #9 – 3″ x 6″ Chisel
Materials Needed: I used batiks from Island Batik
- Cream – fat quarter
- Red – 1/3 yard (includes binding)
- 4 Assorted Red – fat quarters
- Batting
- Backing
Cutting Instructions:
- Cut 12 – Cream #5 Half Square Triangles (HST)
- Cut 12 – Assorted Red #9 Chisel
- Cut 24 – Assorted Red ##8 Rectangles
- Cut 6 – 4 – Assorted Red #2 Squares
Assembly: Sew with a 1/4 inch seam allowance.

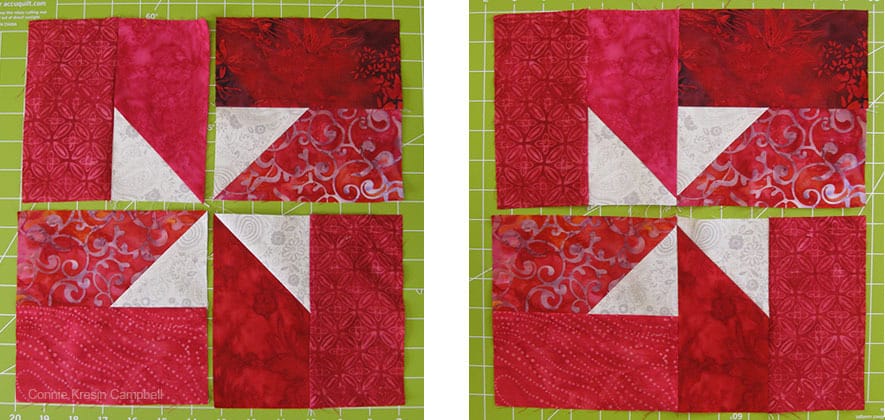
Sew the cream half square triangles to the assorted red chisel rectangles following the diagram below. Make 12 of these.
Add a red assorted print rectangle to the right side of each of the rectangle/chisel pieces. Make 12. Your sections will measure 6 1/2 inches x 6 1/2 inches.
Layout the sections as shown below to make your Christmas pinwheel blocks and sew them together.
If you would like to make the Christmas Pinwheels Table Runner and don’t have the AccuQuilt dies and cutter:
I would recommend cutting all 3 1/2″ x 6 1/2″ rectangles instead of the Chisel rectangle. Dig into your stash and use an assortment of red fabrics.
- RED – Cut 40 – 3 1/2″ x 6 1/2″ rectangles.
- RED – Cut 4 – 3 1/2″ x 3 1/2″ squares.
- CREAM – Cut 12 – 3 1/2″ x 3 1/2″ squares.
Place the 3 1/2″ cream square on top of the red rectangle.
Mark a diagonal line and stitch just a little bit to the right of the line toward the corner – fold it over.
Trim off the excess leaving a 1/4″ seam allowance.

Continue following the rest of the tutorial.
You can see the way the pieces of the block go together.
You will have three 12 1/2 inch x 12 1/2 inch blocks.

The border uses 4 – 3 1/2 inch squares and 16 – 3 1/2 inch x 6 1/2 inch rectangles.

I forgot to take a photo of adding the border so I have included this graphic.
Sew 2 – 3 1/2 inch x 6 1/2 inch rectangles together. Make 8 of these. Follow the diagram below to add them to your blocks.
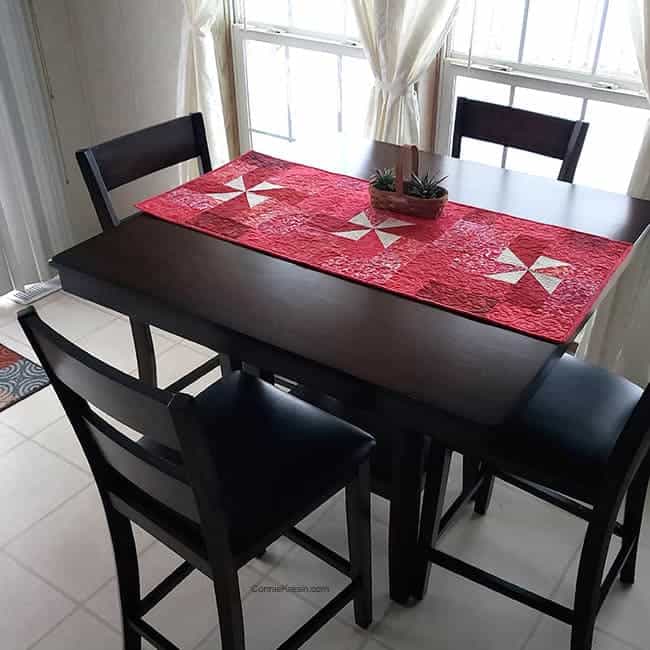
I did not add borders to the length of the table runner as it would have made it too large for my table. If you would like your table runner to be 48 inches long then add the borders. You will have enough fabric for an additional 4 – 3 1/2 inch x 6 1/2 inch rectangles and 4 – 3 1/2 inch squares.

Quilting:
Add your batting and backing and quilt as desired.

Binding:
Cut three – 2 1/2 inch strips by the width of fabric for your binding. Bind your table runner and it is ready to place on your table for the holiday!

I hope you have enjoyed this tutorial and if you make a Christmas Pinwheels table runner please share a photo of it!
Get the Red Pinwheels Table Runner Tutorial
Here are some more of my Christmas quilt tutorials!
Great deals for you!
Looking for great buys on fabric and things? Check out these links


About Connie
Hi, I’m Connie Kresin Campbell, the quilter, writer, and photographer behind Freemotion By the River. I enjoy inspiring others with my quilt tutorials and patterns. You’ll also see my sweet adopted dogs from time to time.
Be sure and subscribe to my newsletter for more free tutorials and printables.


I love your table runner! I have lots of red scrap batiks that I think would look great in this layout!
Thanks for the inspiration Connie!
I am new to your website so I am still looking around but I LOVE that you include the AccuQuilt GO die cutting instructions in your tutorials. I have been collecting them for years and us them a LOT. Thanks so much for your die cutting instructions because usually I have to adapt patterns to my GO dies myself!
Sara, I’m so glad you like the AccuQuilt directions! I have quite a few others that I need to get up on my website. Just do a search for AccuQuilt!
Thanks so much for the tutorial & including the pattern for non-accu quilt users. Love this table runner – hope to have time to make it.
Hello Connie; I enjoy making table runners, especially when they are Christmassy, This pinwheel table runner is wonderful! I will have to check and see if any of our ( a great friend shares her AccuQuilt with me) dies match the ones you have used, we have a small selection to choose from. I was also following some of your “lead” selections at the bottom of your post and discovered several other projects that would be so much fun to create! I had best get busy!! Thank You so much for designing and sharing with us!
Very pretty – love the colors!
Beautiful table runner and great tutorial. Hey, I have those dies. Thanks for giving me more inspiration for projects packed with #CreativeGoodness. I love this.
QuiltShopGal
http://www.quiltshopgal.com
Another lovely project Connie. Thank you